Introduction
DIY basement remodeling is an attainable project that can add valuable living space and boost your home’s value. By finishing your basement yourself, you can create a custom entertainment area, home office, or extra bedroom – all while saving money on labor costs. In fact, a finished basement offers a strong return on investment (averaging about 64–70% ROI) for homeowners. This guide will walk you through how to plan and execute a basement renovation DIY-style, from the early planning stages to the final finishing touches.
Thesis: With careful planning, the right materials, and some handy know-how, you can transform a dark, unfinished basement into a beautiful, functional living area – even on a budget. Let’s dive into the steps and tips for a successful DIY basement remodel.
Section 1: Planning Your DIY Basement Remodel

Before swinging a hammer, successful basement remodeling starts with careful planning. Begin by evaluating your basement for any issues that need addressing upfront. Ask yourself: Is the basement dry and waterproofed? If you’ve ever had moisture or minor leaks, tackle that first. Sealing foundation cracks, installing a vapor barrier, or adding a sump pump might be necessary to ensure a dry space. (There’s nothing worse than finishing a basement and then having it ruined by water damage!) Make a checklist of any repairs or prep work needed, such as sealing walls or leveling the floor.
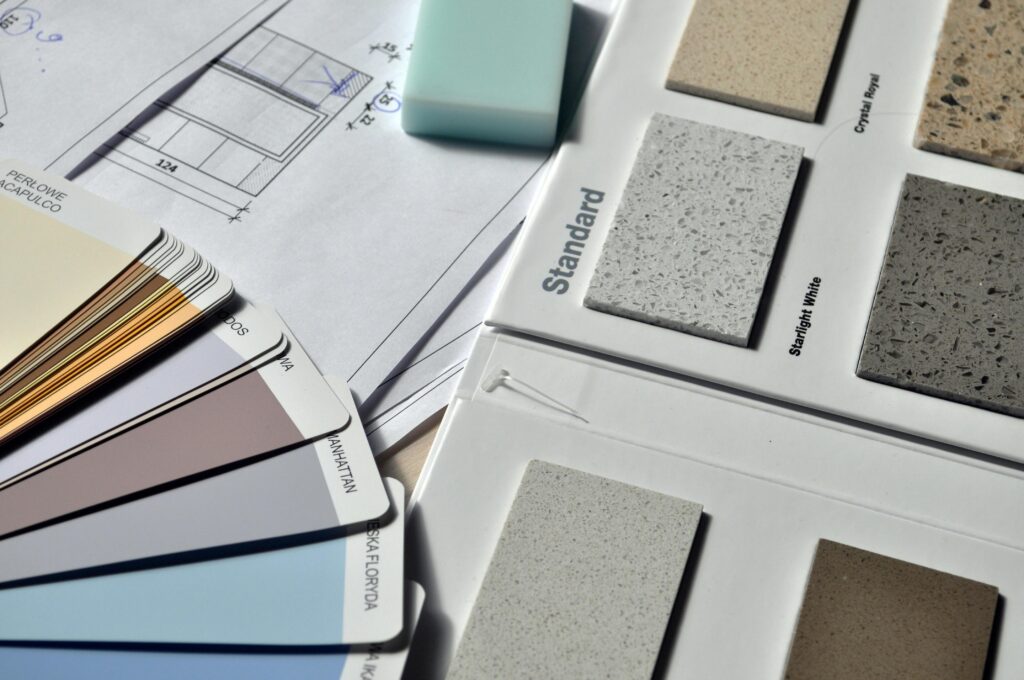
Design and layout: Next, plan out how you want to use the space. Are you creating an open recreation room, a guest bedroom, or perhaps a basement home theater? Sketch a floor plan or use an app to map out where walls, doors, and fixtures will go. Keep heating, ventilation, and lighting in mind during design – basements often need thoughtful lighting plans since natural light is limited. This is also the time to decide if you’ll be adding features like a bathroom or wet bar. New plumbing lines or a bathroom will require additional planning (and likely permits and professional help for some aspects). Prioritize the features you need versus want, especially if you’re on a tight budget. Good planning will prevent costly changes mid-project.
Permits and codes: As a DIY remodeler, don’t overlook permits and building codes. In most areas, significant basement renovations require a building permit – this includes adding habitable rooms, doing electrical or plumbing work, etc. For example, finishing a basement in a city often does require a permit per local building code. Check with your city or municipality on what permits are needed for a basement remodel. It might feel like a hassle, but permits ensure your work is safe and up to code (and they’ll save you headaches if you ever sell the house). Common requirements include proper egress windows in any new basement bedroom (building codes mandate that basements and sleeping rooms have at least one emergency escape window or door), minimum ceiling heights, and sufficient insulation. Plan for the permit process in your timeline – you may need to submit your design or have inspections at certain stages.
DIY vs. professional help: Part of planning is knowing your limits. Be honest about which tasks you can tackle DIY and which might require a licensed professional. Many homeowners can handle framing walls, installing insulation, and putting up drywall with some research and effort. However, electrical and plumbing work are often best left to licensed pros (and in many places, codes require a licensed electrician or plumber for certain jobs). You might choose a hybrid approach: DIY the demolition, framing, painting, and finishes, but hire pros to handle complex tasks like running new electrical circuits, HVAC work, or plumbing a bathroom. This can save money while keeping the project safe and up to code. As you plan, line up any contractors you’ll need and get estimates so you can budget accordingly (more on budgeting in the next section). By the end of the planning phase, you should have a clear idea of your basement’s layout, a rough schedule of work, a list of needed materials, and the necessary permits pulled – now you’re ready to get started on the build.
Section 2: Budgeting and Cost Considerations
One of the biggest questions homeowners have when starting a DIY basement finish is cost. How much will it really cost to remodel a basement yourself, and how can you keep expenses under control? Let’s break down the budgeting process and key cost factors.

Understand the average cost: According to national data, the average cost to finish a basement professionally is around $32,000 (with typical projects ranging from $15,000 on the low end up to $75,000 or more). This usually equates to about $30–$50 per square foot for a basic finish. The good news is that DIYers can often complete a basement for significantly less cash outlay, since a huge chunk of cost is labor. By doing a lot of the work yourself, you might bring the cost down to $10–$25 per square foot, depending on the materials and scope. For example, if you have a 800 sq. ft. basement, a DIY remodel might be in the ballpark of $8,000–$20,000 instead of the $24,000–$40,000 a contractor might charge. Keep in mind this is a rough estimate – actual costs vary by region and the design choices you make.
Cost breakdown: Where does the money go in a basement remodel? Major cost components include:
-
Framing and drywall: Lumber for framing walls and drywall to finish them will be a noticeable portion of the budget, but generally these materials are affordable (perhaps a few hundred to a couple thousand dollars, depending on basement size). It’s the labor that’s intensive – doing it yourself saves those labor costs.
-
Electrical and plumbing: Even if you hire a pro for this, budgeting for it is essential. An electrician might charge a few thousand dollars to wire outlets, lighting, and new circuits in a basement. A bathroom addition (plumbing for toilet, shower, sink) can also run a few thousand in plumbing work. If your DIY plan includes a bathroom, allocate a significant chunk here (plumbing parts plus labor).
-
Flooring: Costs will depend on the material you choose. Carpeting a basement might cost $2–$4 per sq. ft., whereas vinyl plank flooring could be $3–$7 per sq. ft. (Materials for an 800 sq. ft. space could range from $2,500 to $6,000). Opt for budget-friendly yet moisture-resistant options, since basements are prone to humidity.
-
Ceiling: An open joist “industrial” ceiling is cheapest (just paint the exposed ceiling black or white). Installing a drop ceiling can cost $2–$5 per sq. ft. in materials. Drywalling the ceiling is more labor-intensive (and makes future access to pipes harder), but can be done DIY with some help lifting boards – it’s relatively cheap on materials.
-
Fixtures and finishes: Don’t forget light fixtures, doors, trim, and paint. These finishes can add up. Recessed lighting is popular for basements; each fixture might be $20–$50. Six recessed lights could be a few hundred dollars plus wiring. Doors and trim for new rooms will also add a few hundred. Paint is one of the smaller costs (a few gallons of paint and primer might total $150–$300).
Budget-saving tips: Doing it DIY is already a big money saver, but there are other ways to keep the project affordable:
-
Do it in stages: If funds are tight, you can finish your basement in stages. Perhaps frame and rough-in one month, then insulate and drywall a couple months later when you’ve saved more. Spacing it out can make the cost more manageable.
-
Reuse and repurpose materials: If any materials from the basement (old paneling, doors, cabinets) are in good shape, consider refurbishing rather than buying new. Also look for surplus building materials or Habitat for Humanity ReStore for discounted supplies.
-
Keep the layout open: Creating one or two larger multi-purpose rooms is cheaper than subdividing the basement into many small rooms which require more walls, doors, and separate lighting. An open-concept basement remodeling plan not only saves on material, it also maximizes the sense of space.
-
Avoid moving plumbing if possible: Designing your layout to utilize existing plumbing locations for a bathroom or wet bar can save thousands. Moving a drain stack or water lines across the basement is costly; if the bathroom can be located near existing plumbing lines, do that.
-
Do your own painting and cosmetic finishes: Even if you hire pros for drywall or electrical, you can take on the painting, trim installation, and other finish work. These are labor intensive but DIY-friendly tasks that sweat equity can cover.
Expect the unexpected: Finally, build a contingency into your budget. It’s wise to set aside ~10–15% of your budget for surprises. You might open up a wall and find a small mold issue to remediate, or discover an uneven floor that needs self-leveling compound. Especially in older homes, unforeseen issues can crop up. With a contingency fund, you won’t be financially derailed by these surprises. And if you end up not using it – great, you came in under budget! By understanding where the money goes and planning for it, you’ll set realistic expectations and avoid running out of funds mid-project.
Section 3: DIY Basement Remodeling FAQs – Common Questions & Concerns
Remodeling a basement can feel daunting for first-timers. Here we address some of the most common questions and concerns DIYers have before and during a basement project:
Q: Do I need a permit to finish my basement?
A: In almost all cases, yes, you will need a building permit to do a substantial basement remodel. Anytime you are adding habitable space (rooms, bedrooms) or doing structural, electrical, or plumbing work, a permit is typically required by your city or county. This is not just bureaucracy – permits ensure that the work meets building and safety codes. For instance, as mentioned earlier, most codes require an egress window in any new basement bedroom (for emergency escape). You may also need inspections for electrical wiring and plumbing to make sure they’re up to code. If you live in a specific locality, check your local rules: major cities and suburbs almost always require permits for basement finishing. Some minor cosmetic changes (like painting or installing floating floors) might not need a permit, but constructing walls, running new electrical circuits, or installing a bathroom definitely will. Always better to be safe and ask your building department about permit requirements before you start – unpermitted work can lead to fines or issues when selling the home.
Q: How difficult is it to DIY a basement remodel?
A: It’s a moderate-to-large project, but very doable if you plan properly and are willing to learn. Think of a DIY basement finishing as a series of smaller projects: framing walls is one project, wiring outlets another, hanging drywall another, and so on. None of these tasks are impossible for a determined DIYer – there are countless tutorials, books, and videos to guide you. However, it does require time, patience, and a basic level of handiness. If you’ve never done any DIY home improvement before, a full basement remodel might be biting off a lot at once. In that case, consider breaking the project down or bringing in help for critical pieces. Many handy homeowners find that tasks like framing or laying flooring are within their skill set, but things like mudding drywall or soldering copper pipes are learned through experience (and mistakes). The key is to educate yourself on each step (maybe practice on a smaller project first), and don’t hesitate to get professional assistance for parts of the job that feel too complex. Also, expect that a DIY basement remodel will take significantly longer than a professional crew – possibly a few months of nights and weekends, depending on your schedule.
Tip: To avoid burnout, set a realistic timeline and celebrate milestones (after insulation is done, after drywall is up, etc.). It’s a marathon, not a sprint, but many DIYers have successfully finished their basements and you can too!
Q: What are the biggest challenges or “gotchas” in basement remodeling?
A: Some common challenges include: moisture, code requirements, and working around obstacles. Basements are prone to moisture issues – whether it’s minor seepage or just high humidity. You absolutely want to address waterproofing before putting up drywall or flooring. This might mean sealing walls, improving exterior drainage, or installing a dehumidifier. Another challenge is dealing with existing obstructions like low ductwork, pipes, or support columns. These can make framing and finishing trickier. Often the solution is creative: you might hide ducts in a soffit or create a dropped ceiling section, and box in support columns as design features (like building them into a half-wall or bar). Code requirements (like the aforementioned egress windows, or the required ceiling height which is often 7 feet or higher) can be a hurdle if your basement doesn’t already comply. If you have a very low ceiling, for example, you might not legally be able to call it “living space” without underpinning (lowering the floor) – which is a major project. It’s good to know these constraints upfront during planning. Lastly, many DIYers find the sheer scope to be challenging – coordinating materials, managing debris (there will be a lot of dust during drywall sanding!), and keeping the project organized requires project management skills. The best way to tackle challenges is to research and ask for advice.
Online forums (like the HomeImprovement subreddit or DIY forums) are full of people who have faced similar issues; you can learn from their experiences and solutions. With patience and problem-solving, most challenges can be overcome.
Q: What about electrical and plumbing? Can I do those myself?
A: These are probably the most critical (and regulated) parts of a basement finish. If you’re simply running some new lights or outlets off an existing circuit and you have a solid understanding of electrical work, you might handle minor electrical tasks yourself. However, adding new circuits to the breaker panel, wiring a lot of outlets, or any complex electrical is best done by a licensed electrician for safety. Many locales require a licensed electrician for new electrical permits anyway. For plumbing, tasks like running PEX water lines or installing a sink can sometimes be DIY’d if you’re experienced, but anything involving tying into sewer lines or building a new bathroom (with drainage, vent stacks, etc.) might need a licensed plumber. Mistakes in plumbing can lead to leaks and flooding – not something you want in your new space.
Bottom line: It’s perfectly fine to DIY some parts of electrical/plumbing if you have the knowledge and your codes allow homeowners to do it (some places do allow homeowners to pull permits for their own house). But if you’re unsure, hire a professional for these trades. You can always do the prep work to save money (like drilling holes in studs for wires or running PVC drain lines and having a plumber check/connect them). Safety is paramount here – never work on live electrical, and ensure plumbing work is done to code to avoid sewer gas issues or leaks.
These FAQs cover just a few of the common questions. The overarching advice is: do your homework, follow building codes, and don’t be afraid to consult professionals for the complex stuff. With those safeguards in place, you can proceed with much more confidence on your DIY basement remodel.
Section 4: Step-by-Step Basement Finishing Process
Now let’s get into the nuts and bolts of how to finish a basement. Every project will have its unique aspects, but most basement finishing jobs follow a similar general sequence.
Below is an overview of key steps in the process, along with DIY tips for each stage:
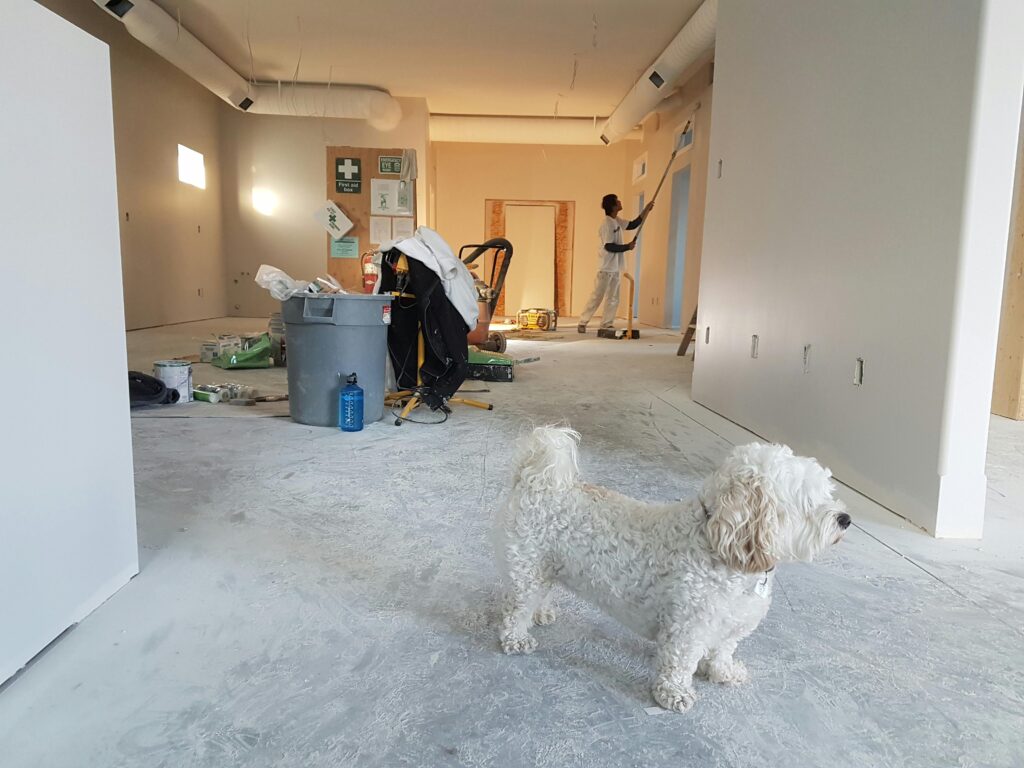
1. Prep and Demolition: Start with a clean slate. This means clearing out the basement and demolishing any existing finishes that you won’t be keeping. If your basement has old wall paneling, drop ceilings, or carpet, remove them and get down to the basic structure (exposed concrete walls/floor and open joists). It’s much easier to work in an open, empty space. While doing demo, wear safety gear (gloves, eye protection, dust mask) and be cautious of utility lines. One big part of prep is addressing waterproofing (as mentioned before). Ensure any leaks are fixed and consider applying a masonry waterproofing paint to foundation walls. This is also the time to install any needed framing for future sump pump or check that your existing sump pump is working. If the concrete floor has large cracks or uneven spots, repair and level those areas now. Essentially, prep work isn’t glamorous, but it sets a solid foundation for everything to come.
2. Framing Walls: With a dry, clean space, you can frame the new walls according to your layout. Use treated lumber for any framing that will touch concrete (bottom plates on the floor or any furring strips on walls) to resist moisture. Standard 2×4 lumber works for most interior basement walls. Tip: When framing against exterior concrete walls, many DIYers leave a small gap (half-inch or so) between the wood and concrete to avoid any direct moisture transfer – or use foam board insulation against the concrete, then frame in front of it. Attach top plates to the joists (or use construction adhesive + ramset for concrete ceilings) and bottom plates to the concrete floor (you’ll need a powder-actuated nail gun or concrete screws for this). Then add vertical studs 16 inches on center. Don’t forget to frame for any doors (add appropriate headers) and include blocking for things like wall-mounted TVs or handrails if you know their locations.
Pro tip: This is also the stage to frame soffits to hide ducts or pipes. Use 2×2 or 2×4 framing to box around any low-hanging utilities so that later you can cover them with drywall for a clean look. Once framing is done, your basement will suddenly start looking like actual rooms!
3. Rough-In Utilities (Electrical, Plumbing, HVAC): After framing, run your utilities through the walls before you close them up with drywall. For electrical, plan your outlet and switch locations (code often requires outlets every 12 feet along walls, and GFCI outlets in basements). Cut holes in studs for running wires (a 3/4″ spade bit works well for Romex cable). If you’re doing it DIY, be very sure to follow electrical codes: use the correct gauge wire, don’t overload circuits, and secure cables properly. Many people at least have an electrician do the hookup to the main panel for new circuits (wiring into the breaker box can be dangerous if you’re inexperienced). For plumbing, if adding a bathroom, this stage might involve breaking concrete to lay new drain lines unless your basement already has rough-ins. That can be a big job – consider hiring it out if needed. Running PEX water lines through studs is relatively DIY-friendly if you have basic plumbing knowledge; just remember to include shut-off valves and test everything for leaks before closing walls. If you’re installing a simple wet bar, plumbing is easier (maybe just one sink). HVAC is often minimal in a basement; you might tap into existing ductwork to add a vent or two in the new rooms. If you need to extend ducts, do it now (or have an HVAC pro handle the calculations to ensure you have sufficient airflow). Also consider ventilation or returns – sometimes basements benefit from an air return grill to circulate air properly. After rough-ins, inspections (if you have permits) usually occur to sign off that framing and rough utilities are up to code.
4. Insulation and Vapor Barrier: Basements can be chilly, so insulating is important for comfort. Common options: rigid foam boards against the concrete walls, or fiberglass batt insulation between the studs. If you used foam boards on walls, you can also insulate stud cavities with unfaced batts for higher R-value. If using fiberglass, be sure to put up a vapor barrier on the warm side of the insulation (i.e., toward the interior) if your local code requires it – this is typically a 6-mil plastic sheeting stapled to the studs. Proper insulation will not only keep the basement warm but also help control humidity. Don’t forget to insulate along the rim joist (the area where the house framing meets the foundation at the top of the basement walls). Rigid foam cut to fit in each joist bay works well there, or use spray foam for sealing small gaps. This step is often quick and instantly makes the basement feel less cave-like.
5. Drywall (or Wall Finishing): Time to close up those walls and ceilings. Hanging drywall is labor-intensive but something many DIYers can manage with a bit of help. You’ll need to measure and cut drywall sheets to fit your wall frames. Use drywall screws to attach them to the studs (make sure to hit the studs!). For ceilings, it’s easier with a second set of hands or a rental drywall lift. Once all boards are up, you move to mudding and taping the seams – this is arguably one of the trickiest parts for newbies. Apply joint compound (mud) over drywall tape to cover seams and screw holes, feathering it out smoothly. It usually takes 2-3 coats of mud, with sanding in between, to get a nice flat finish ready for paint. Take your time; good drywall finishing makes a huge difference in the professional look of your basement.
Alternatives: Some people opt for drop-ceiling grids for easy access to pipes, or wall panel systems. These can be pricier but are options if you dislike drywall work. By the end of this step, you have actual rooms with finished walls and ceilings – congratulations!
6. Flooring Installation: With walls done (and primed/painted ideally before flooring to avoid paint splatter on new floors), move to the floor. Basements benefit from flooring that handles moisture. Top choices include luxury vinyl plank (LVP) flooring, tile, epoxy coatings, or carpet tiles. LVP is popular because it’s DIY-friendly (click-lock installation) and water-resistant. Ensure your concrete slab is clean, level, and dry. You might need an underlayment for some flooring types to prevent vapor issues and add warmth. If you choose carpet, use a vapor barrier carpet pad made for basements. Flooring is often one of the quicker tasks – you can lay a floating vinyl floor over an entire basement in a day or two. And it instantly makes the space feel complete and cozy. Don’t forget baseboards or floor trim after the floor is in; it covers the expansion gaps and gives a polished look.
7. Trim and Finish Carpentry: In this penultimate step, install your interior doors (bedroom or bathroom doors in the basement), window trim (if any), baseboards, and any molding. If you built any built-in shelves or have a staircase that needs finishing touches (like stair railings or skirt boards), complete those now. Caulk the gaps in trim and give everything a fresh coat of paint as needed. These finishing details really pull the project together.
8. Paint and Final Touches: Lastly, paint the walls with your chosen colors (it’s easier to do this before flooring for most people, but you can do final coat after trim for the best finish). Use lighter colors if you want to make the basement feel larger and brighter, since basements have less natural light. Install light fixtures and cover plates on all your outlets and switches. Bring in your furniture and decorate the space to your liking. This is the fun part where your vision comes to life – a formerly dreary basement is now a usable extension of your home!
By following these steps in order, you ensure that you build your basement methodically, covering all structural and safety considerations before the cosmetic work. Remember that inspections (if required) will slot into the process at certain points (usually after rough-ins and at final completion). A pro tip is to keep a project journal or checklist so you don’t forget any steps (for instance, it’s easy to forget to run a coaxial cable or Ethernet cable for internet/TV before you close the walls – think of those during rough wiring!). Step-by-step, piece-by-piece, you will see your basement transform. Take each task one at a time, and before you know it, your DIY basement remodel will be complete.
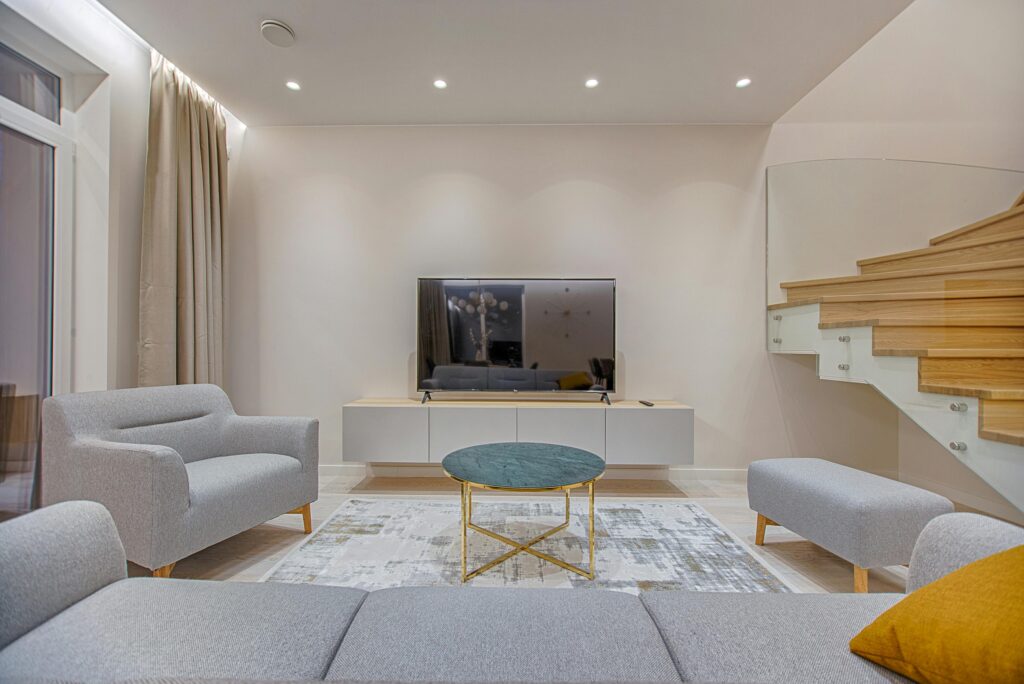
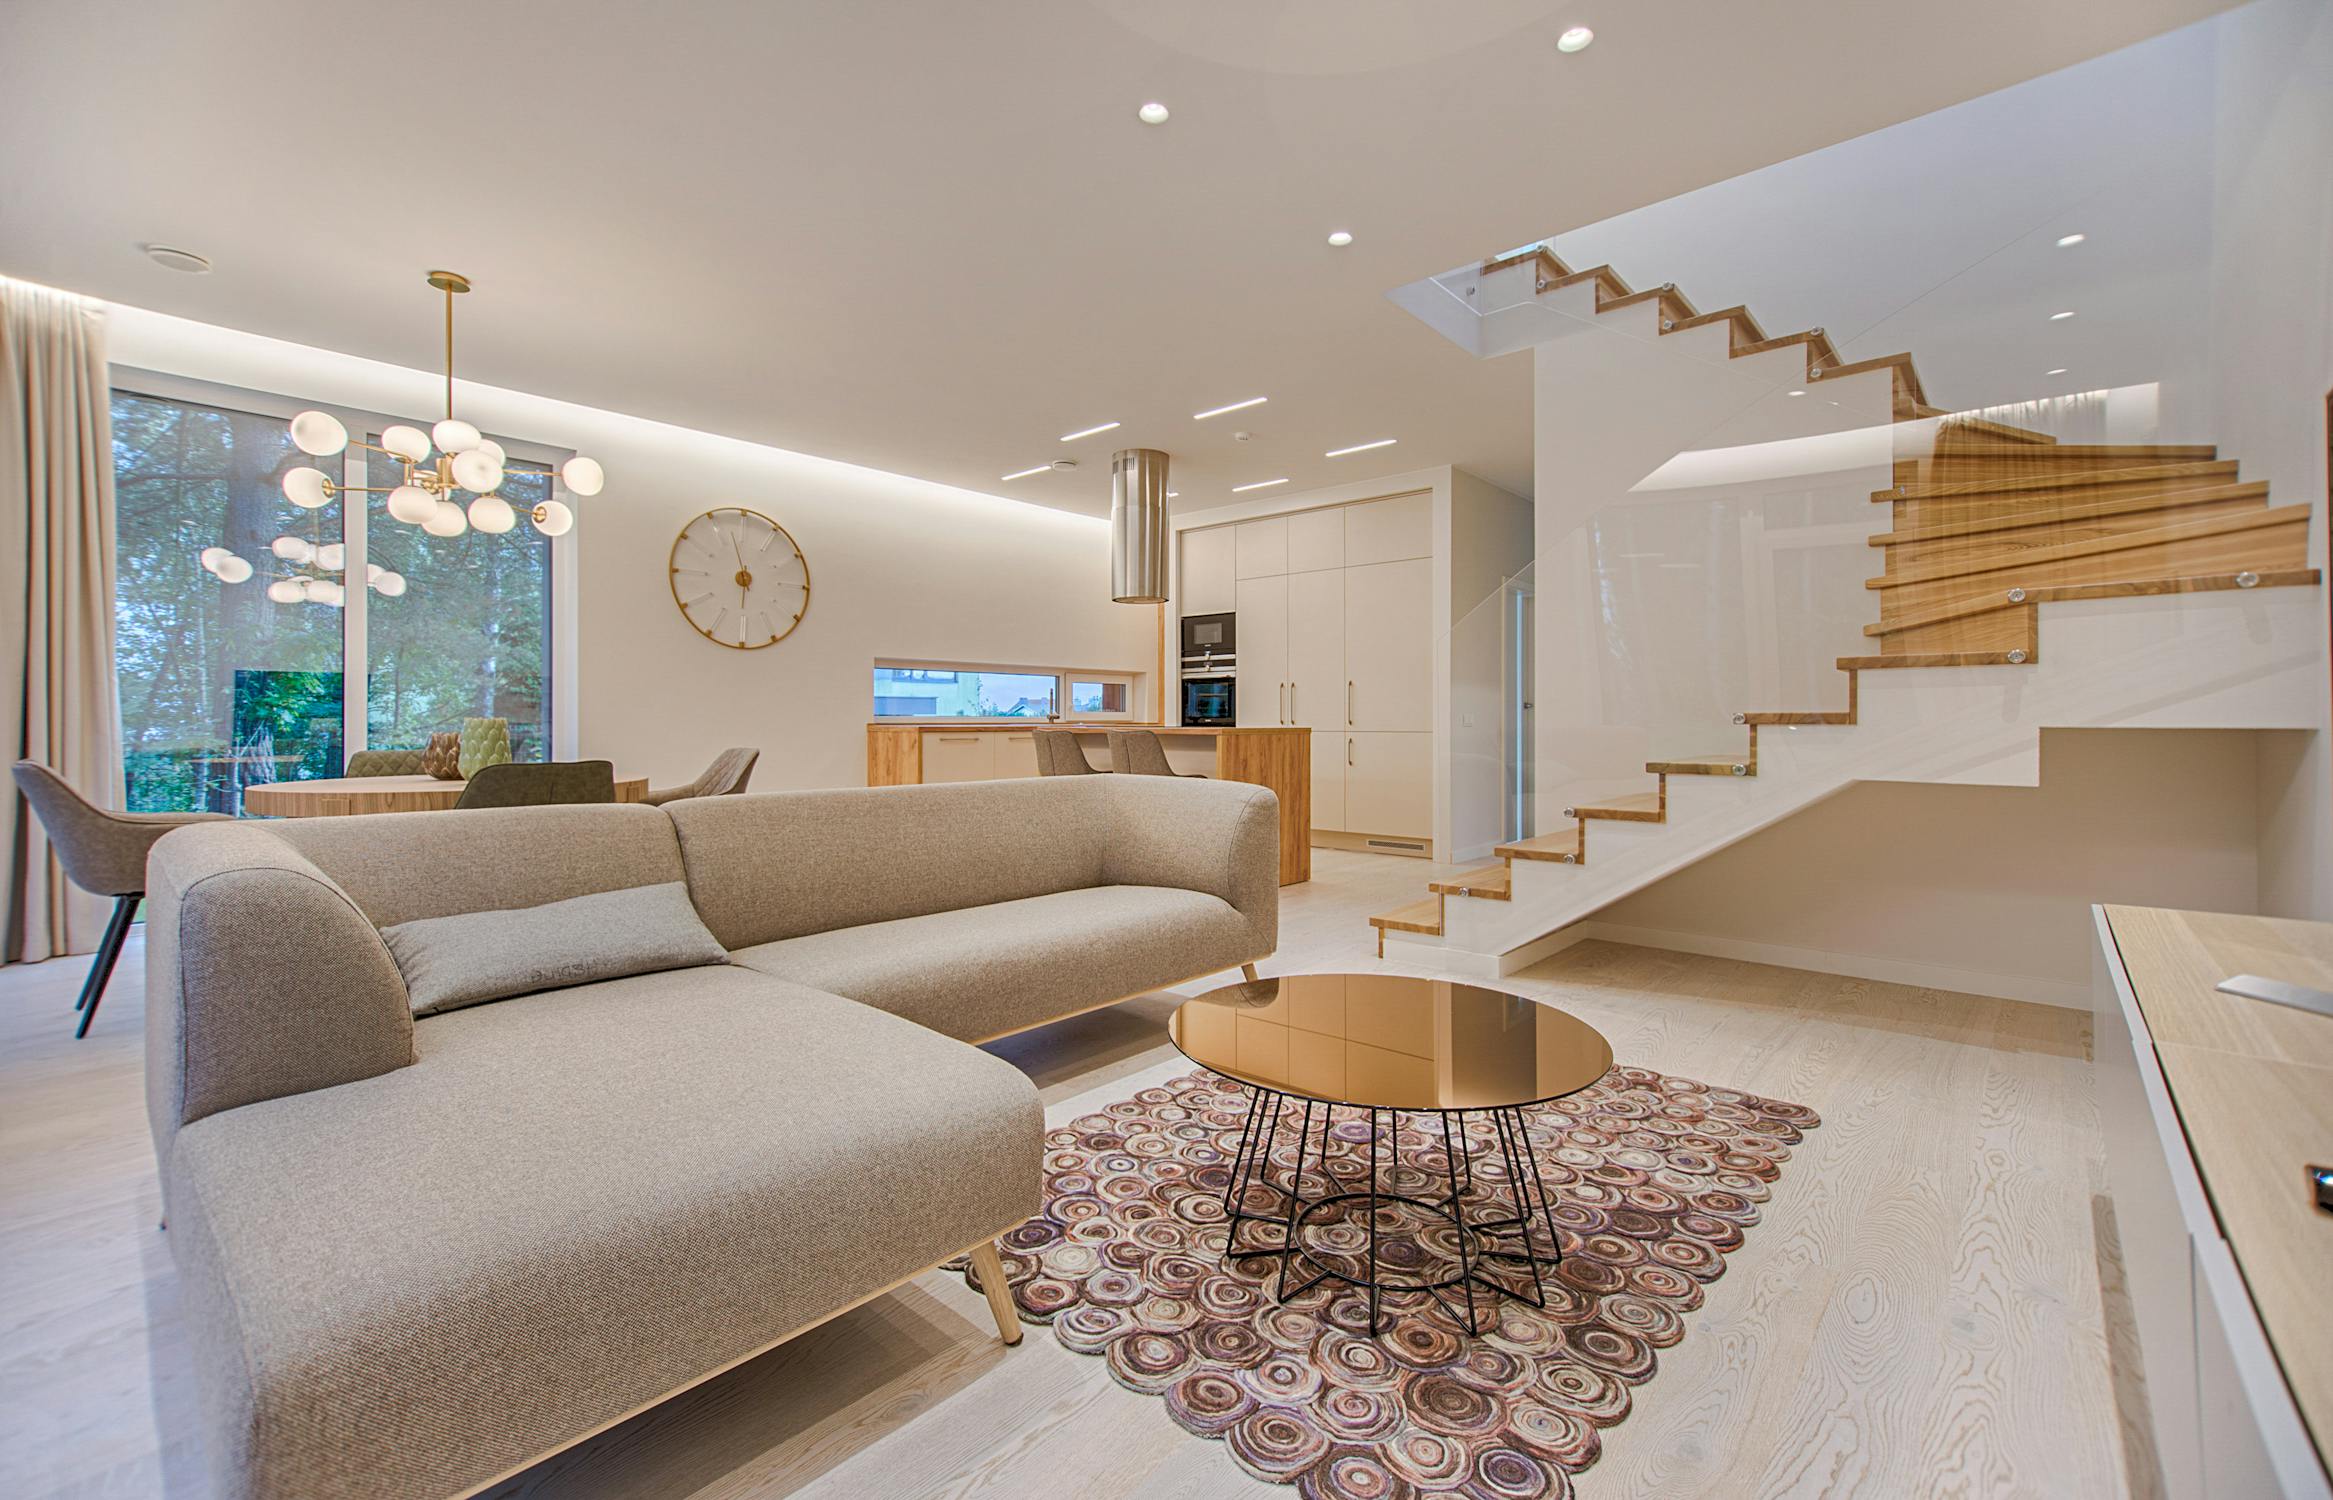
Section 5: Finishing Touches and Creative Basement Remodeling Ideas
With the heavy construction work behind you, it’s time for the finishing touches that truly make your basement space your own. This section will explore some creative ideas to maximize the functionality and style of your newly finished basement, all while keeping things budget-friendly and DIY-friendly.
Lighting and ambiance: Basements can sometimes feel closed off, so proper lighting is key. Now that drywall is up and painted, consider installing layers of lighting. Recessed ceiling lights provide great general illumination – if you put them on dimmers, you can easily change the mood. Add floor or table lamps in corners to warm up the space. If it’s a hangout area, string lights or LED strip lighting (for example, along a crown molding shelf or under a bar counter) can add a cool vibe for very little cost. For a home theater section, wall sconces or rope lights along the ceiling can create that cinema feel. Don’t be afraid to get creative – one DIY trick is using smart LED bulbs that allow you to change color temperature or even color hue; you could have a bright white setting for playtime or work, and a soft warm setting for movie night. The goal is to banish the dingy basement stereotype with ample lighting that makes the room inviting.
Basement decor and themes: Think about how you want to use the space and consider a theme or focal point. For example, if you’re creating a home theater, you might install a projector and screen on one end, with comfy reclining chairs or a big sectional couch facing it. You could even DIY some risers for a second row of seating if ceiling height allows – truly bringing the cinema home. If the basement will be a family game room, consider setting up a dart board, ping-pong or pool table (if space permits), or a board game table. For a home office in the basement, make sure to incorporate plenty of task lighting and maybe build a custom desk or shelving unit – basement remodels often have odd nooks that are perfect for built-in shelves. Another popular idea is a basement bar or kitchenette: you can install a simple countertop with cabinets and a mini-fridge, creating a space to serve drinks and snacks when entertaining. This doesn’t have to be expensive – you can repurpose old cabinets or use ready-to-assemble cabinets, and a DIY concrete countertop or butcher block can save money over stone. The possibilities are endless: gyms, playrooms, craft studios, an extra bedroom for guests, or even an in-law suite. The beauty of a basement is that it’s a blank canvas that can serve any purpose you need.
Creative finishes on a budget: A high-end look doesn’t have to come with a high-end price tag. Here are a few ideas for stylish yet affordable basement finishes:
-
Accent walls: Add character by creating an accent wall. You could use reclaimed wood planks for a rustic barn-wood wall, or install faux brick panels and paint them white for a chic loft feel. Even a bold paint color or wallpaper on one wall can add interest without overwhelming the space (and without costing much).
-
Open ceilings with a twist: If you opted to leave the ceiling exposed (to save height or money), consider painting it all one color (typically black or white). A black painted ceiling can make pipes and ducts visually disappear, giving a trendy industrial look. String lights or track lighting can then be added to this open ceiling for a cool contrast.
-
Floor rugs and zones: Use area rugs to define different zones in your basement. For instance, place a plush rug in the TV/lounge area, which adds comfort and also sets that section apart visually from, say, a game table area with bare floor. Rugs are also helpful if your flooring is a hard surface like concrete or vinyl – they warm up the room (and your feet).
-
Furniture and storage: Basement remodels shine when you include ample storage, since many basements also double as storage areas. Consider building cabinets or cubbies along one wall to hide away seasonal items, tools, or toys. You can DIY built-in bench seating with lift-up lids for storage (great for a playroom or home theater – storage and seating in one). Use furniture that fits the scale: a large sectional can make a spacious basement super cozy, while a small basement may benefit from a futon or modular seating that doesn’t overwhelm.
Adding value: Your DIY basement remodeling project isn’t just sweat and effort; it’s adding real value to your home. You’ve effectively increased the finished square footage of your house, which can boost resale value significantly. A basement remodel is considered one of the best home projects for return on investment – as noted earlier, many recoup ~70% of the cost in added home value. But beyond monetary value, think of the daily value: you’ve gained a whole new living area. Whether it’s hosting movie nights, giving teenagers their own hangout spot, or providing a quiet office retreat, the finished basement will likely become one of your favorite parts of the house.
Finally, don’t forget the finishing touches that make the space yours. Decorate the walls with artwork or family photos. Maybe mount that big TV on the wall or decorate with a neon sign for your home bar. Small touches like throw pillows, curtains (yes, you can put curtains in front of any small basement windows or even use them to cleverly fake a window and make the space feel more open), and plants can bring life to the basement. Many people are amazed at how a well-finished basement no longer feels like a basement at all – it feels like an extension of the home, sometimes even the nicest part!
In summary, use your creativity in this final phase. You’ve already done the hard work of building the space; now enjoy personalizing it. The beauty of DIY is that you can customize everything to your taste, and you likely saved a bundle doing so. Step back and admire what you’ve accomplished: from a concrete box to a beautiful, functional living space. And if you’re looking for your next project, you now have the perfect cozy spot to scroll Pinterest for more ideas 😉.
Conclusion
Remodeling a basement DIY is a significant project – but as we’ve shown, it’s absolutely achievable with the right planning, tools, and mindset. We started with a plan: addressing any moisture issues, drawing up a layout, and pulling permits to ensure everything is done safely and legally. We discussed budgeting and learned that doing much of the work yourself can save a lot of money, making a basement remodeling project feasible even on a tight budget. By breaking the remodel into manageable steps – framing, roughing in utilities, drywall, flooring, and so on – you can transform your basement from an unfinished storage area into a comfortable, welcoming part of your home. Along the way, you’ll gain new skills and the satisfaction of building something with your own hands.
Key takeaways: Don’t skip the prep work (it will pay off in the long run), keep code requirements in mind (for example, include that egress window if you made a bedroom), and be patient with yourself during the process. It’s normal for a DIY basement project to take a couple of months of weekends, so set realistic goals and celebrate each milestone. Remember that even if it’s DIY, you’re not “doing it alone” – there are plenty of resources and communities out there to help if you get stuck or need advice.
Now that you’ve learned the ins and outs, you’re ready to embark on your own DIY basement remodeling adventure. Imagine the result: perhaps a finished basement where your family gathers for movie nights, where friends come over to watch the big game, or where you set up that home office or gym you’ve always wanted. All of that added living space and functionality is within reach. So roll up your sleeves and get started – your dream basement is waiting in those bare walls and concrete floors!
If you feel excited but still a bit unsure about tackling everything solo, we’re here to help. As basement remodeling experts in the Chicagoland area, we’ve assisted many homeowners in creating their perfect basement spaces – whether through guidance for DIYers or stepping in for the tougher tasks. Feel free to contact our team for a consultation or even just to discuss your basement finishing plans. We’d love to help you make your dream basement a reality. Good luck with your project, and enjoy your new space once it’s done – you’ve earned it! 🎉